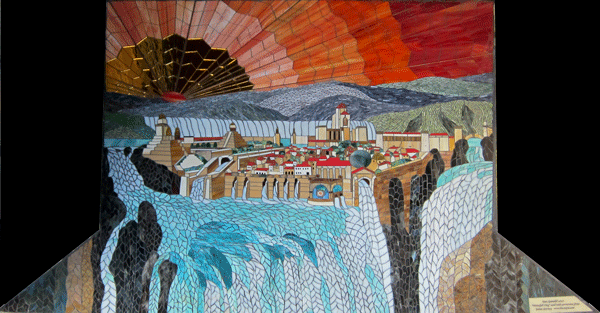
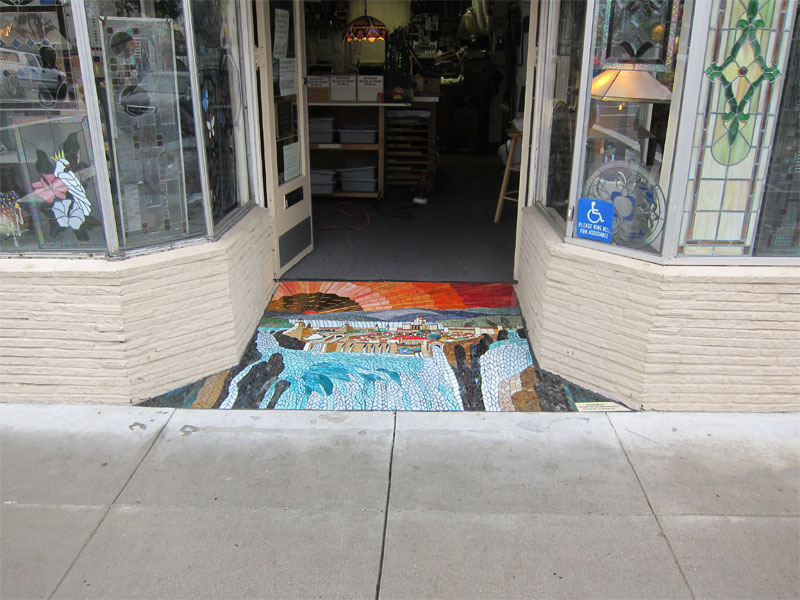
On October 10, 2012 a four year odyssey finally came to an end. What began as an inspiring illustration by James Gurney called "Waterfall City" in Spectrum1-The Best In Contemporary Fantastic Art became a 22 square foot mosaic in the entryway to my storefront. Little did I realize it would take so long.(Click on each picture to enlarge)
My first step was to contact the artist to get permission to use his artwork.
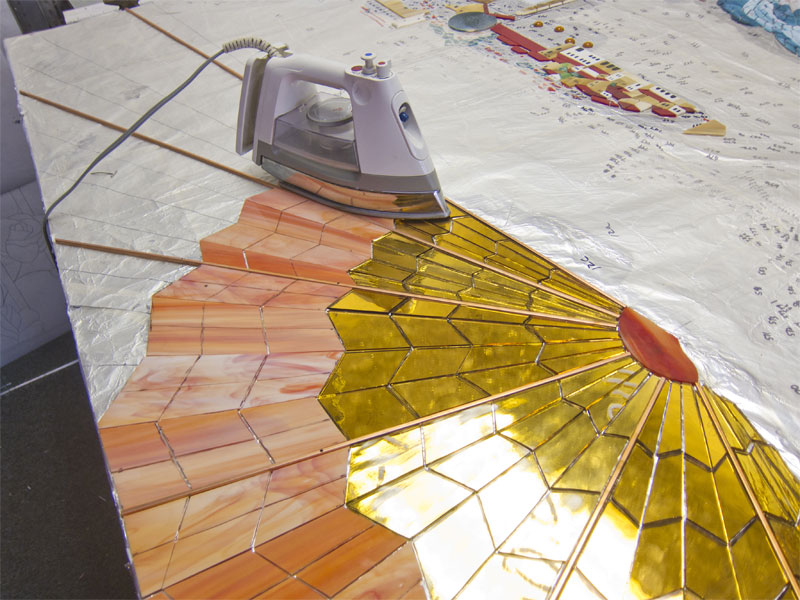
(As you can see, I estimated I'd be done by 2010-WRONG) Once obtained, I enlarged the illustration and converted it to logical shapes for mosaic. I made a plywood template of the entryway. I then lined the plywood surface with aluminum foil and lightly spray glued Streuter No Days Mosaic Adhesive Film to the surface. The plan was to glue the glass to the aluminum foil then slide to glass and foil from the plywood into place with a mastic to attach the foil to the existing 12 x 12 tiles.
Streuter No Days Mosaic Adhesive Film is a heat activated glue that liquifies at 160°F. Once it's cooled it is set. This seemed ideal as I wouldn't have to wait around for glue to cure. I used a tracing wheel to transfer the design to the foil. Luckily, I did a test sample and discovered the glue melted through the tracing wheel holes and would have glued the foil to the plywood. I placed silicone paper release liner between the plywood and the aluminum foil, problem solved. Streuter suggests using a heat gun to activate the glue but with the small pieces of glass and not wanting to heat the exposed sheet glue next to the glass, I elected to use a clothes iron to heat an area at a time.
When doing very small glass pieces I use a soldering iron rheostated down to a lower temperature to tack glass in place.
Once all the glass was in place, I used a No Days Curing Station to make sure I had a good attachment.
I came to realize the best way to get accurate patterns was to use a Sharpie to draw where the shapes were on the aluminum foil then take a photo having a ruler in the picture.
I then resized the photo in PhotoShop using the ruler guides and printed it out on heavy paper. I used regular lead pattern scissors to cut the pattern paper.
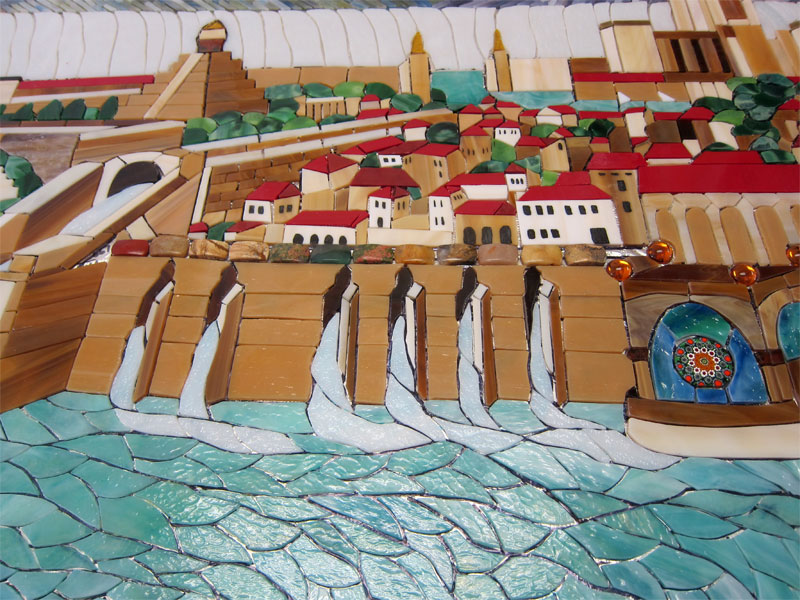
Knowing the mosaic was going to be walked on, I had to keep the glass pieces as small as practical to lessen the likelihood they would crack. In order to create windows and doors in the city buildings, I painted and fired black stained glass paint to 1250°F which permanently fused the paint to the glass.
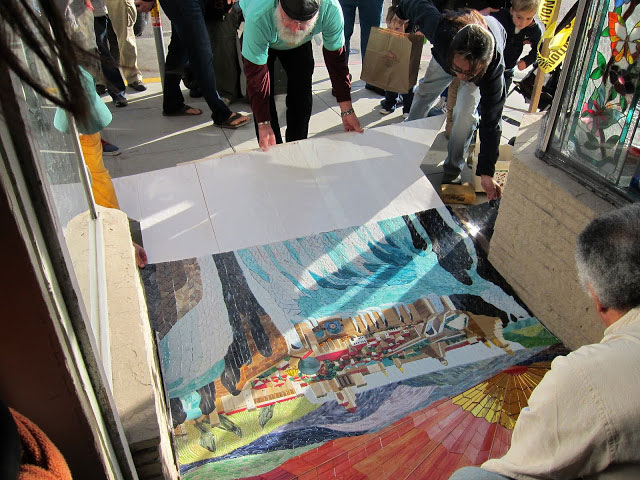
For the first three years, the project was in a loft area here in the shop and only worked on in my spare time. In February 2012, having just had my 70th birthday, I figured I'd better get going on it because I was only about one third done. I moved the project down from the loft area and spent late nights and my "days off" to complete the work. Although it's almost 100% glass, there are some stone beads from a bracelet making up the wall,
and a Murrini piece for the cathedral window.
Finally finished, I needed to get the right mastic to glue metal (the aluminum foil) to tile (the base material). After a little searching I found Latapoxy 300 to be perfect for the job. After filling in the seams between the 12" tile to help keep the base as level as possible
I spread the epoxy with a 1/8" notched trowel. I'd spaced out three finishing nails extending out about 1 1/2" at the top of the plywood in order to be able to draw the plywood out from under the glass without disturbing the epoxy.
It went in perfectly. After stomping it down flat it needed 24 hours to set.
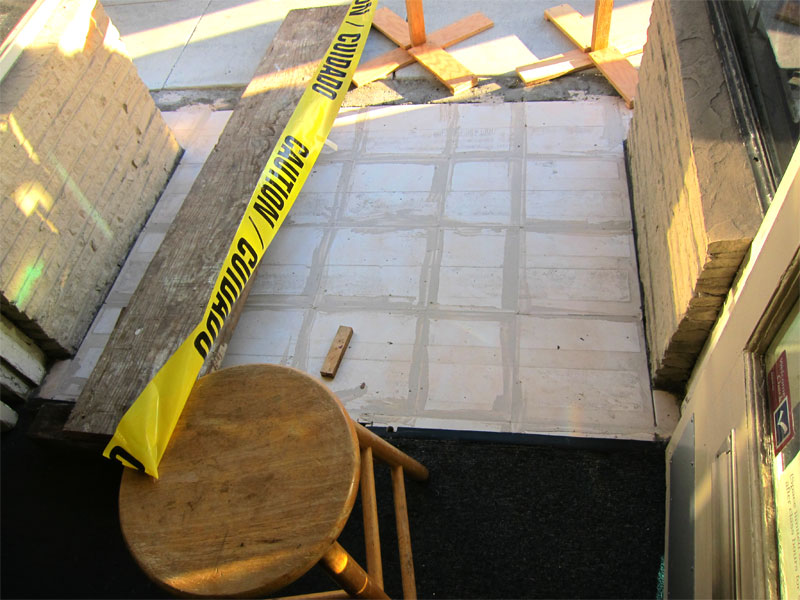
I'm so glad it's finally done. Here's the "before"
the "after"
and a little installation video. Thanks for watching. Dan